30 Mar 2013

Demon (Evil Miniatures) - review

Today I will show you one of the last minis I got in my hands, Demon sculpted by Vlado Turek who's the man behind Evil Miniatures.
I found the mini on the PlanetFigure forum a while ago, and simply couldn't resist (and trust me I was trying:D).


The Mini:


Name: Demon
Manufacturer: Evil Miniatures
Sculptor: Vlado Turek
Material: Resin
Scale: 1:32 (65mm tall, 49mm to the eyes) 


The box:


In the box: 
As you can see from the photos above, parts are secured with rather thick cartboard box and few layers of bubble wrap. On top of that parts are placed in small plastic bags, so there is no chance something will get lost.


Quality of the cast:
On the first glance after removing parts from the bags, cast seems to be absolutely crisp and flawless. Under further examination I managed to find few small mould lines:at the back of his legs, at his back and one little below his back:D (the last one will be covered with the fabric stripes though). Front of the mini and other parts, as far I can tell, are free from any mould lines. 
I found also few airbubbles under the surface of the mini. There is only few of them, placed at the back of the thighs and on the chest (the sufraces facing up while the mini was casted I guess), and they're small and easy to fix. 
There is a little bit of flesh on his claws, but it goes away under a fingernail. Shoulderpads and fabric stripes are clean and pretty easy to detach from the resin bar, even though some cleaning of the detached surfaces is necessary.


Assembly:
As far I can tell at the moment, assembly of this model will be easy and very straightforward. Parts fit together nicely, and Valdo made sure to make it for us as easy as possible.
He even made sure that the places where we need to attach demon's arms are hidden under some sort of armbands, so no filing is required whatsoever. Shoulderpads and stripes of cloth also fit really nicely, and only minimal amount of putty will be required to hide the joint.
On the photos below, you can see some details of the cast and assembly.


Overall opinion:
(Once again I'd like to remind that the opinion is absolutely subjective and based on my copy of the mini and my personal, slightly twisted, taste)
I must say it's a great miniature, I absolutely adore the sculpture and I'm really happy with the quality of the cast, packaging, and 'customer care'.

cheers

'eM

24 Mar 2013

Best freehand ever:D


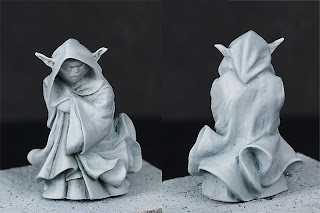
Quick WIP of one of my many many projects... Bloody Yoda from Knight Models.
Quite an early stage, clothes are just mess after trying new technique (not really working thb;/), but the face is almost ready. Of course there is still some work to be done but at least you can see features of his face... And that's all freehand, seriously. At the poto below you can see him just after priming. only the nose and right eye are more or less visible... Left eye is just a blob, mouth... is somewhere under the nose. And tbh that's the face after an exchange;] The first cast it was just one porous blob instead of the face... So I must say, I'm proud of his face now, and of my freehand skills;]


cheers

'eM

16 Mar 2013

Textured material - approach 1

Today I'll try to show you how I painted texture on the red cloth around Grinder's hair, and recreate the same effect on a blue mantle.


First I'll tell you how I achieved this texture on Grinder and them I'll try to do step-by-step on the Wraith and Viking, as the used technique may vary a little.

Red cloth:
At the beginning I was going for plain and smooth red, so I basically did all the lights and shadows as smooth as possible. Then I noticed that it doesn't look good enough, especially next to the leather elements. Besides with this scale it's almost a sin not to try some freehands.
Because I noticed that foldes and recesses of the cloth look almost like feathers, first I was thinking about emphasizing it with adequate freehand, but I was worried that it may look too girly, so finally decided against it. Then I tought about simple fabric pattern. It shouldn't be to difficult to do, and should look real/believable enough.

Because I had only a general idea how to achieve desirable effect I simply jumped into a deep water and took the brush with a bit of 'Jack Bone (P3) and started to paint thin lines on the brightest parts of the cloth.
Why 'Jack Bone? No idea, honestly. I guess it might be simply because it was already on the table and I was to lazy to look for off-white. I trully doubt there was any clear thought behind it.
Of course not every single line was nice and thin, but I decided it's OK. Sometimes manually weaved fabrics have thicker threads as well.

To keep colour nicely red I did some red lines on the bright areas too. It helped to create even more contrast between threads. Then I used the same red to create light threads in the shadows. And finally some Leviathan Purple (GW wash) to create dark threads there as well. After a while I added few beige lines in the shadows at the back of the cloth, in the shadows. And when threads were more or less done, I applied a layer or two of red ink (Deep red W&N). Few more touch ups and little corrections and the cloth was ready.
I think that using wash instead of ink would also do the trick, but probably I'd need few more layers (as inks have more pigment than washes, while still being transparent).

Blue mantle:

For this piece I was planning to do mantle full of mystical symbols and signs.... but I was too affraid that I'll spoil the whole paintjob, so decided to do something simpler. 
The technique used here is pretty much the same as with red cloth on Grinder, first smooth blending, then thin and faint white lines, then some turquoise glazes, turquoise lines and some more glazes. I decided not to introduce really dark lines here, because the whole mantle should stay rather light in colour, ethereal. Also I tried to do the lines thinner than on the Grinder, mostly because the mini is much smaller, and I didn't want the fabric to look fake or extremely thick.

Colours I used to paint the mantle:
- VMC  off-white (70820)
- VMC blue green (70808)
- VMC medium blue (70963)
- VMC black (70950)


At the photos below you can see few steps of the process:


The noticable differences in the hue of the cloak are mostly my experiments with painting, and only a little inconsitency with lighting.

15 Mar 2013

6th Cofc Miniature Exchange mini published

Here is the miniature I painted for 6th Cofc ME. My recipient Hellspawn, just received my package so I can post it here:


 cheers
'eM


7 Mar 2013

Awesome blog collections

I'm constantly searching for, and discovering new and awesome blogs and websites about our hobby. Mostly by browsing known blogs and checking their 'blog lists'. And I must say sometimes I find true treasures this way. But recently I found two really awesome sources. I'm so happy about that, so I need to share my joy with you:


One is blog called The Pewter Brigade, written by Johan Kees, who specialize in historical pieces painted with oils (mostly ancient rome). On his blog you can find two really nice things. First is lots of reviews, photos of unpainted , freshly unpacked historical minis, and the second is really impressive list of blogs from our community.

And the other one is spanish 'Figure International Magazine'. I don't speak spanish at all, so I don't really know if the website itself is good or not, but their resources are pretty ipressive.
Not only do they have very long and very diverse list of blogs, but also equaly nice list of manufacturers and associations.

So if you're looking for something different than only wargaming pieces, those two places trully worth checking.

cheers

'eM