Showing posts with label bases. Show all posts

26 Sept 2014

Euromilitaire results.

What a lovely weekend it was!
I had really great time, seeing all my friends,  making some new ones... indulging in the hobby, seeing lots of awesome paintjobs and buying some of the amazing products avaliable during the show.
It's a real pitty that now we have to wait a whole year for next Euro... I know, I know, there are some other great shows later this year (MSS, Hussar, Bugle Call and maybe more), and early 2015, but sadly I won't be able to go there... so I'm waiting for yet another trip to Folkestone, and planing what should I paint;]
But let's talk about this year's show for a while longer.

First shopping.
I bought most of it on Saturday, so chronogically it should be first.
As you can see on the photo, I didn't buy much.


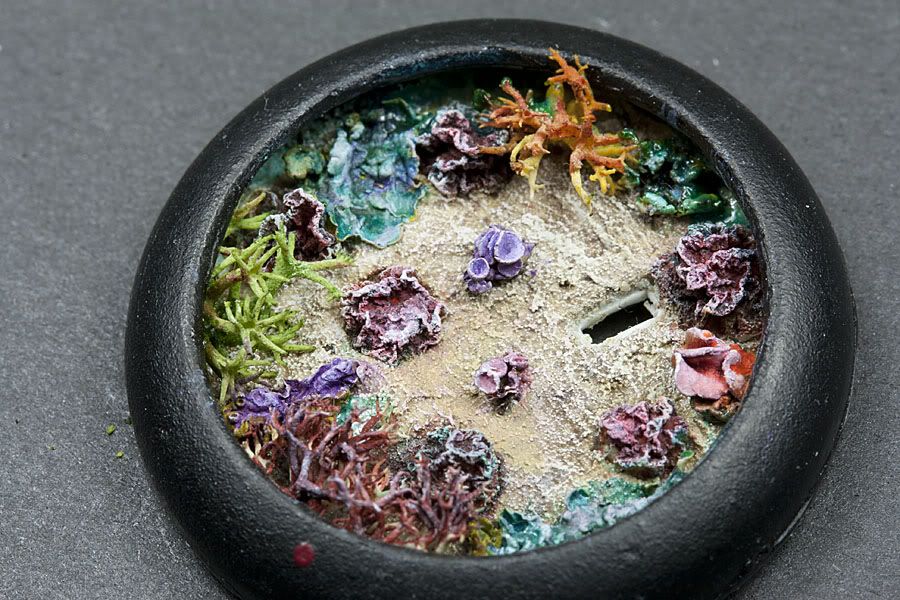
  • Just few unique bases, I love buying them during shows, where you can see them from every angle and find best ones that suit my models. One of them will be used right away, for my Diablito, cute little guy sculpted by Roberto Chaudon.
  • A beautiful bust of Aquila, Roman Legionary, made by Nut's Planet, scale 1/10, casted in resin. I've seen it recently around painted by many amazing painters and feel like I'd like to give it a go. Not much of a chance to do it completely different than others (you know, the uniform and all that) but I hope I can leave my mark on it anyway.
  • Battle Chick, One of new releases from Nocturna Models, a beautiful girl from the line Necrospace. The mini is 75 mm tall (according to the producer's website), 1/28 scale, cast of course in resin. I think I'll be doing some small changes to her equipment, but othet than that, she's trully gorgeous.
  • And a piece I had in my mind for few years alerady. A gorgeous Mermaid from Origen Art. Another resin cast in 1/28 scale. I feel the right time came to finaly buy her and paint. I can't wait to start with all the rust and weathered parts, and the mermaid itself of course.
  • Two video tutorials from Painting Buddha, about freeehands and basing alchemy (first part earth). I have their first set of DVDs and can't wait to see those two. 

Entries, and badges.
This year I entered 4 pieces, all of them busts, one historical and 3 fantasy. Luckily enough all of them got a badge.
Sapo - Gold
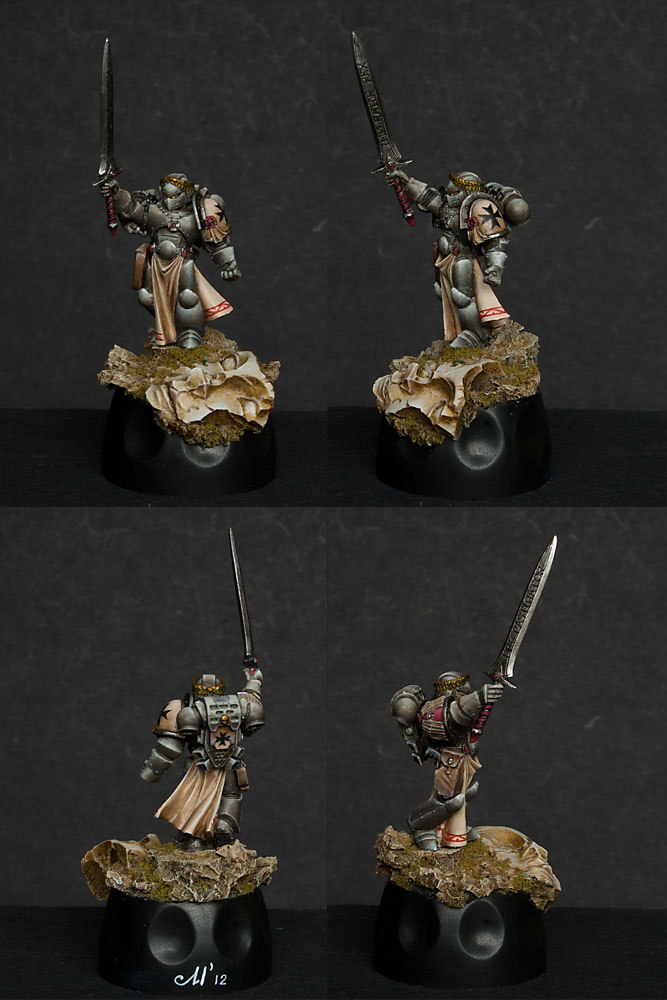
Old Gnome and Leon - Bronze
Landsknecht - Commended
I'm more than happy about that, as it shows some consistency in my painting, at least I'd like to think it does. And I gathered some valuable feedback from judges, so there is a chance my painting will improove in the mentioned areas:D
Below you can see a solo photo of my golden boy, Sapo.

Photos from the show:
I tried to take as much photos as I could. But both, social side of the event and my unability to take decent photos during such a busy show, stood in the way;]
My photobucket gallery. and some found in internet:
FB gallery of Andrew Nai,
FB gallery of Pekka Tapani Nieminen,
Platoonbritannica thread,
Photos taken by Rob Pollock and presented at imodeler.com: Part1, 2, 3, and 4,
Photos taken by a fellow PB-er Theunrealisticartist,
Photos published on militarymodelling.com,
Some photos found on the very nice blog The curious way.


cheers
'eM

15 Mar 2013

6th Cofc Miniature Exchange mini published

Here is the miniature I painted for 6th Cofc ME. My recipient Hellspawn, just received my package so I can post it here:


 cheers
'eM


28 Jan 2013

Mysterious mini - first layers of paint.

Another small update on the base (mini is still a secret).
First layers of colour, still lots to do, mostly contrast and colour variations on the stone (plus some tidying up), but you can see the general idea.


I'm thinking about shifting the dead beetle's colour more towards green, to make it stand out a bit more.
But other than that, I'm quite happy with the way this base is shaping up. Ferns will be added at the very end, to avoid accidental damage. They are not as fragile as dried plants, but rather delicate nonetheless, so I'll keep them separate.


BTW it's quite obvious, that I might be in my turquoise phase now;p

cheers

'eM

26 Jan 2013

Etched brass for the first time

Really qick post to show you my first contact with etched brass foliage.


Quite a fun I must say. I think I'll be using them more often from now on.
At the beginning I had no idea how to deal with it, how to bend fern leafs into desired shapes, but quick search in internet and I knew everything. To be honest, as long you don't need to bend etched brass into very specific shapes, all you need is a lighter and a bit of caution to avoid any accident with fire.
Because I need to hurry with this piece I won't be able to do proper tutorial how to work with etched brass, but I'm gonna use it on Viking's base as well, so I'll do my best to prepare some decent step-by-step while doing so.

cheers

'eM

15 Jan 2013

Urmuth's base

The base is almost done. The shape will stay as it is now, I just need to work on colours and dust.
I might be tempted to add some more plants, but I'm not sure yet.


And with the piece getting closer and closer to the complition, I must say, I can't wait till it's finished, so I can start something new.

cheers

'eM

27 Oct 2012

Talrashi - base WIP

Still not really in shape to paint, but at least I did some work on Talrashi's base.
I hope it will be fairy tale-ish enough when I'll finish with it;]


Not much to say here at this point, almost everything is glued in place, only few plants need to be added on the top, some touch-ups to fix some errors;]
I was going to prepare step-by-step tutorial about this base, but I'm missing few steps already, so I guess, it's gonna be normal tutorial;p

cheers

'eM

16 Oct 2012

Talrashi - little mini, little update

I'm still not really fit for painting, but I managed to do some work on the mini and base.
Definitely less is done when it comes to painting, but the base requires less precision, and is more forgiving when it comes to fixing mistakes.


I'm trying to take a lot of pictures of the base, so I should be able to show you step-by-step article later (if the base will turn out as planned;p).

cheers

'eM

10 Apr 2012

Menhom's base - almost finished (WIP)

The base is almost done, just a few more touches under the bones to add more shadows, and some dust on the dress when it will be glued in.


And of course the sides of the plinth and a nice plaque with the name.

cheers
'eM

6 Apr 2012

Red bricks - review... well kinda;p


I don't know how about you, but for me it was a huge problem to imagine how the large or small bricks will look with  1:72 or 1:35 minis. But if I can see even one or two types of them on the photo next to the mini, and I know their dimensions, I can judge all the other ones by comparison.
It's true not only with bricks, but also with various plants and etched brass elements.

And if you're like me, not very great with all these scales and sizes, you may find this little article helpful.


Large bricks by Pegasus Hobbies
There  bag I bought  contains 50gm of bricks (around 100 pieces). The individual bricks are approximately 1.25 x 0.7 x 0.7 cm.


The bricks are seriously irregular and more suitable for modelling rubble & the debris of war.
If you want to build something out of them,  you'll need the patience (lots of it) to sand them to shape. But it's not easy to find too many bricks in similar shape. Maybe it would be easier to buy 2 or 3 bags, and then separate bircks into few piles judging by shape. But you need to made a decision first, if you're gonna need so many bricks:D


1/35 Scale Bricks, Dark Red by Juweela
The bricks are circa 0.72 x 0.36 x 0.18 cm and correspond to the kingdom format for brick used between 1850-1950.

As far as I know Juweela bricks are distributed by diffenent companies. For example I  bought mine with 'Mikora Modellbau Manufaktur' label, but they're also sold by PK-PRO.

Producent says they are 1/35 scale, but as you'll see on the picutre below, they seem a bit too small next to the 54 mm miniature.

There  is another problem with this product. The bricks are not rectangular. They're wider at the bottom and in the corners you can see triangular 'excesses'. I'm guessing it needs to be filed before building anything.


Small bricks by Pegasus Hobbies
There is also another type of bricks, more similar in shape to the big ones I have.
Producent says that bricks sizes are roughly 0.5 x 0.2 x 0.3 cm.


I tried to buy this one, but lucky for me they went out of stock. Judging by the photo they have proportions of the big ones I  bought (aren't that long and flat like the other ones) but 5mm long can be too small even for the 28mm mini, and definitelly for my patience when it comes to building;]


Here you have few photos  to compare both sizes of bricks between each other, Hirst blocks and miniatures in 1/72 and 1/35 scale


How to treat bricks:
At this point I have no experience with gluing or painting the bricks I bought, but they look similar to the Hirst blocks, so they should behave the same way.
If that's true,  PVA glue is enough to keep them together and they should accept acrylic paint easily. Also cutting,sanding and creating battle damage should be easy.


cheers

'eM

4 Apr 2012

Quick update - Menhom's base WIP

Here is the first version of the base:  dry earth, bones and lots of dust.


 I'm not entirely sure if the cracked earth is the best choice here. Maybe I'll swap it for old and also cracked stone floor... But bones and dust stay in both cases. I just need to rearrange bones in nicer way, when I'll be sure what type of the surface will be used.

Dress is not yet ready, It lacks few more dots and lots of glazes to unify them a bit and bring back the redness of the midtones.

cheers

'eM

29 Mar 2012

Little bones for basing

At the moment I'm preparing another base with natural bones, so I thought I might as well tell you how to deal with them in our hobby.

But first few informations:
1. No animals were killed to obtain these bones, well they were killed and eaten, but not by me and not for the purpose of collecting base accessories. Pure cruel nature.
2. Some people may feel disgusted by the process of acquisition of the bones... I must say I don't understand that, but... well... If you feel you might have weak stomach or feel sick for trivial reasons, don't read this article, find another way to make your bases look awesome:D


Where to fing such a tiny bones (the gross part begins:P):
As you probably know, owls have very weak stomach acid, and are unable to digest bones and fur (and  they swallow their prey whole or in small pieces) , so they vomit it after a while. Ornithologists call that vomit pellet.
There are other animals that do that (for example cats, hawks, eagles and other raptors), but the owl's, in particullar Barn owl's, pellets have the bones in the best condition (weakest stomach acid).
The important thing here to remember is: it's vomit not a poop, it comes out the front end not the rear!!

You can buy natural pellets on ebay, sometimes with bone charts, as children are using them sometimes at school at biology classes to reconstruct bone structure of little mammals.
There are also artificial pellets avaliable, but I have no idea how the bones look like in them.


What can we find in a pellet:As I said earlier pellets are masses of bone, teeth, hair, feathers and exoskeletons of various animals.
Here are types of the bones you can find there.
Of course it vary in every pellet. This is 100% natural thing and all depends what the owl eaten that day.
But normally you can find: Skulls, jaws, parts of the spine, ribs, tibias, and other long bones.


That's the picture of the bones I got from my 6 pellets. It will probably be enough bones for my entire hobby life.


How to dissect a pellet:
1.Use latex gloves, and a dust mask. Ideally, you should have obtained your pellets from a reputable dealer, who will ensure that these pellets can't transmit rodent-borne disease (there is a note on ebay auctions if the pellet was sterilised).

2. Begin to pull apart your pellets with your hands, slowly and carefully. This tiny pellet is filled with small, fragile bones that you'll want to preserve. If the pellet proves to be too hard, you may soak the pellet in water to soften it. That creates a muddy mixture of bones, fur and other things. I personally prefer to deal with the dry pellets than wet, but it's entirelly up to you.

3.Separate the mess of fur, feathers, and bones with tweezers. As you break the pellet into smaller and smaller pieces, you can soak your pellets in water to remove the fur and feathers from the bones. Place the bones gently to one side, in a clean container or on paper towels.

4. Clean the bones thoroughly and just to be sure put into a cleaning/disinfectant liquid for a day or two.

5. Dry the bones and store them in a container, making sure they are out of reach of children and pets, you know.
.. just in case.


At the picture below you can see the bones in comparison with 28mm miniature (Hasslefree Akanke).
They would look great as a monster's bones in this scale, and skulls can be used for example as a dragon's remains. With bigger miniatures we can use them (the bones) as parts of human's skeletons.


How to glue and paint the bones:

If I remember correctly I was using PVA glue, but I believe they should survive contact with super glue without problems. In fact I just tested it on a very thin bone, and there are no signs of dissolving.

Paint them as anything else on your base, use primer at the beginning and then paint normally. You can stop licking your brushes for a while when painting bones, it's an animal's remains after all, even if sterilised.
Just be careful when picking them up with your tweezer, they're fragile and can be crushed easily.
And of course wash your hands after touching them, just in case.


And at the end, here are examples, where I used the bones on my bases:


Next base with bones soon, maybe even tomorrow:D

cheers

'eM


23 Jan 2012

VCofCME & Emperors Champion


My exchange mini painted for Superhessianv reached finally it's destination, so I can post some pictures of the finished mini  and WIP.


As you can see painting 'black' armor wasn't easy and smooth process;p But I guess I learned something from that lesson (i.e. I know how to paint  gray armor now;p)
Mostly because I had no idea where I am heading  with the armor, at the beginning I painted it with Field Blue from Vallejo Model Color,  and had to fight all the time to hide this background colour under more brownish hues. But I guess I can treat a layer of Field Blue as an underpainting, that gives final colours something extra.


For a base I decided to use one of the Scibor's basing kits, few bits of cork, sandy paste and grounded sponge. It's rather simple, so I hope it doesn't drag viewer's eye from the mini.

I placed it all on the top of screw top lid from one of old GW paint. Now I think I could paint it as well, but the mini is out of my hands now, so it's too late.


If you'd like to see other minis painted for this exchange, here is VCofCME gallery.


cheers

'eM

10 Sept 2011

Candles


Candles are pretty easy to made. You just need: sticks (I used the ones from cotton thingies to clean ears;p) thin wire to make candlewick, bit of gs to fix it inside the 'candle' and plenty PVA glue and patience.

1.Creating a candle
Cut sticks into pieces (as long as you require), fix it to the flat surface temporarily i.e. with blue tac (or you can fix it where it should be for good with a gs formed in the shape of melted wax), fix a wire on the top (you can make the flame first or just leave the wire a bit longer to do that later) and then start placing glue to imitate melted wax.
I was doing that with a thin brush, just placing a drop of glue on the top of the candle letting it to go down. You're gonna need a lot of layers to build up and ofc sometimes you'll start not from the top but somewhere in the middle to make the melted wax look better and more natural.

Here is the picture of finished candles, but because PVA glue is white it's quite hard to see what exactly is happening there, so next you can see candles after priming.


2. Flames.
I did it in two steps. First I had to create general shape of the flame, and later, when gs was hard enough, I added a bit to make it a bit wider at the bottom. Probably I could do it at one time, but my skill with gs is not great yet;p
And of course not every flame is perfect, but in group they look good enough.

3. Fixing candles to the surface.
Like I said before, you can use gs to do that, but I decided to do it with a PVA glue. And just like with melted wax on the candles, I placed small amounts of glue around the candle to create a round-ish shape of melted wax:


4. Painting
There is no one good recipe how to paint candles. Everything depends on your other light sources. If the additional light source is strong enough it would be look something like that:


If candles are the strongest light source on your base, just the tips of them would be bright and bottoms hidden in shadows with a stripe of more intense colour in the middle, like on this pictures:


As for the colours you could use, all depends on the colour of the wax you like. I used 'Menoth White Base' from P3 as a base colour, Offwhite (70820 Vallejo model color) for highlights,  Sepia shade (78200 Vallejo wash) for shading, and some yellow glazes to warm candles a bit.

4. Painting a flame.
That was tough I must say. Looking at various photos of burning flames I had one idea how to do that, but miniatures painted already, were saying something completely different.  But because 'miniature way' is more spectacular, I decided to go this way.
So, following this article: Fire - theory, I made bright bottoms and orange tops.


5. Painting OSL on the floor....
That's something I'm still trying to figure out how to do properly, so I'm not gonna even try to give you any advices on that subject.
Maybe just a few pictures:


Cheers
m