Showing posts with label Andrea. Show all posts

26 Feb 2013

Port Royal - Inbox

While I'm working mostly on my 'secret piece' I can't show you any photos of the progress. So, in the meantime, I decided to do a review.
Yet another Andrea Miniatures lovely model, another of my favourites subjects: the Pirate


The mini:

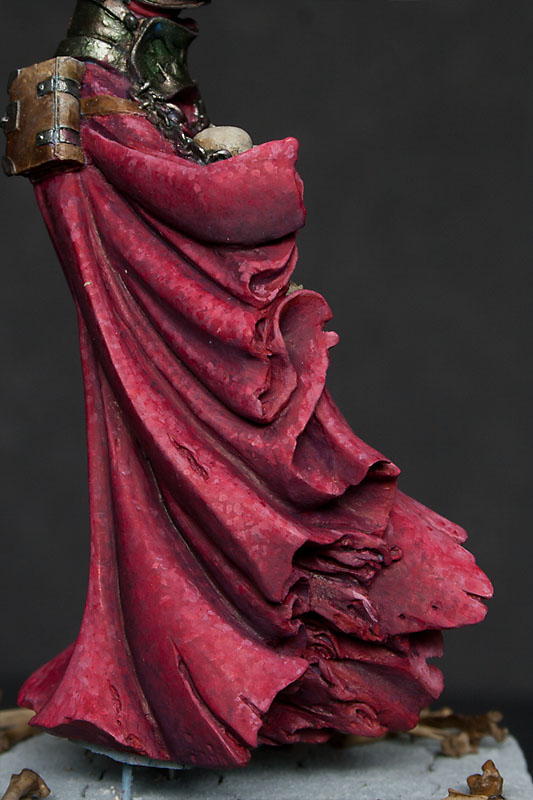
Name: Port Royal, 1660
Manufacturer: Andrea Miniatures
Product code:PC-06
Category: Pirates of the Caribbean
Material: White metal and resin
Scale: 1:32 (54mm)


The box:


In the box: 


As you can see, parts are secured very well with two layers of thick cartboard and thick sponge, so there is no chance that anything can move inside during transport.

Quality of the cast:
On the first glance, the cast seems to be very nice. There are some delicate mold lines and imperfections, but it is rather complex model, so I can understand and accept that. At this point I can say, nothing is damaged, and the metal surface is rather smooth.The resin parts are more rugged, but because it's only wall and ground, I can guess the extra texture was intentional.
Of course all the thin parts (blade especially) are rather thin and bend easily, so we need to be careful with them.


Assembly:
Well... The mini is rather complex... So I can expect some small obstacles and difficulties with the assembly, but at this point it's just my guess. 
But the very most important thing for me will be of course the order in which I'm gonna assembly the piece. So far I was experimenting with with that on different miniatures, and must admit the trial and error approach got me nowhere. I'm not sure if there is one right answer to that problem, but I'll do my best to find the ways best for me and the particular minis.


Other Andrea Miniautes reviews:
Menhom Dark Shadow 
Urmuth, Scars of War


cheers

'eM

19 Jan 2013

Urmuth - belt buckle

Folowing one of my friend's advice, I decided to rapaint the buckle on Urmuth's belt. I tried to make it look like a gray gem. And here are the results.

I know that photos aren't that great. But I had to do them with on camera flash. Lamps would be in danger, as my cat's were displaying unbelievable levels of hyperactivity. So I had to be very quick and pray that they won't demolish anything;p Of course there was small accident. Mila was trying to lick mr U so hard, so he ended up on the floor, hence destroyed ends of his horns.

But anyway, he's in one piece again, nothing irreversible happened, and here are the photos:


Suprisingly I must say, the wooden axe handle, even though not finished yet, doesn't look too bad in such an extreme close-up. You can see some beginnings of the wooden pattern.
The gem itself isn't too bad as well. I might need to fix the highlight on the top, but other than that I'm quite happy.

And what do you think?

cheers

'eM

18 Jan 2013

Urmuth - another small update

I did some more work on Urmuth. But because it might not be so obvious at the first sight, here is the list of what I did:

- I fixed his eyes a bit - still suck but a bit less;p But in my defense it's awkward part of the sculpt
- I did horns, and I'm really happy with them
- I did the ribbons around his horns
- I painted this weird thingy on his skirt (the one with triangles)
- I shaded the bottom of the fur
- I was working on the fabric on the handle of the axe, but now I think I need to repaint it (probably gonna do old leather here)
- I was working on the handle itself, but it's not there yet. I'ts kinda silly that the wooden handle is so thin here (axe itself looks quite massive and heavy) but I'm not gonna fix the sculpt. I was thinking painting it like metal element, but there is splitted wood at the end, so it needs to be wooden. I guess I can assume it's some sort of magic stick or something;p


cheers

'eM

15 Jan 2013

Urmuth's base

The base is almost done. The shape will stay as it is now, I just need to work on colours and dust.
I might be tempted to add some more plants, but I'm not sure yet.


And with the piece getting closer and closer to the complition, I must say, I can't wait till it's finished, so I can start something new.

cheers

'eM

22 Sept 2012

My EuroTrio;]

Here are my boys:D
Quick groupshot for now, but everyone should have a solo photoshoot closer to the next weekend.


cheers

'eM

12 Aug 2012

Textures - crushed velvet

This time I'll try to explain how I did the velvet robe on Menhom Dark Shadow.


I started the robe as plain red. As you can see I even added some initial lights and shadows. But then I realised that this robe is big enough (I'd even say huge) to add some freehand, or maybe texture.
Because initially I was going for old and dusty look, the embroidery, I was going to mimic with freehand, would have to be fairly damaged. I wasn't sure  if I'll be able to do that, so I decided to go with crumpled velvet look.

To do that I decided to try 'doting' technique presented by Alexi_Z in her video tutorial. That was my first try, so the results are far from ideal, but I'm quite happy anyway. I learnt a lot doing that piece, and the next attempt should be more successful.

On the first two pictures you can see the initial shading on the robe. It's not perfectly smooth or too contrasty, but it's OK. I'm gonna cover it with lots of dots.


When I made my mind how exactly I I'm gonna paint the robe, I did a little try on one of the creases to find out If I'm capable of pulling that off.


It looked quite nice, so I started to build shadows.
On the pictures below you can see how I was trying to control depth of the shadows not only by used colour, but also by placing more or less dark dots in the recesses.


Then I started to add dots with brighter colours to create lights. Like with painting smooth surface I was building lights gradually, by change of colour and placement of the dots.

Later it was mostly going back and forth with various shades to build a nice gradient. I used quite a lot of base colour to make shadows and lights less uniform. To soften the transitions a bit and made it look more like a fabric, not just collection of dots, I used some red glazes.


On the pictures below you can see the difference glazes did. Colour is more vibrant, and whole robe looks more consistent.


 And here, finished robe, with some final highlights on the edges.


And at the end, colours I used to paint the robe, maybe someone will find it helpful. I know that I'm using some really old and discontinued GW colours, but you can easily find something similar in other ranges.

Base:
Red Gore (GW)

Highlights:
1st light Andrea Flesh Paint Set
Offwhite (70820 VMC)

Shadows:
Liche Purple (GW)
Storm Blue (GW)
Black (70950 VMC)

Washes (GW):
Baal red
Devlan mud
Leviathan purple
Thraka green


cheers

'eM


30 Apr 2012

BMSS Nationals - London 28/04/2012

The day before yesterday I was at BMSS annual show in center of London.
British Model Soldier Society is a bunch of very friendly people with a common interest in historical miniatures, mostly soldiers.
But they were kind enough to let all the fantasy painters to take part in their competition in one of the non-military categories.
I was lucky enough to pick up two trophies: Silver for Andrea's miniature, Menhom Dark Shadow, and bronze for JMD's bust - Anton the Infected.


If you want to see more bigger pictures of the minis, here they are:
Menhom Dark Shadow
Anton the Infected

cheers

'eM

29 Apr 2012

Menhom Dark Shadow

Finally!!! I can say he's finished and ready to rest in my cabinet:D

Great pleasure to paint, even if it took so long:D
I learned few more things thanks to that mini.

Definitely not the last piece from Andrea, although I know I need to be very careful with the cast quality next time.

cheers

'eM

17 Apr 2012

Almost there - WIP

Menhom is amlost ready:D
I need to fix the OSL and dress, add some dust, but the work is slowly coming to an end.
What do you think?:>


And here are few pics of Grinder's swords. Except metallics, all with oils  and WIP ofc:D

And a close up. I must say, I love the blending you can achieve with oils:D I definitely need to learn how to use them on higher level:D


cheers

'eM

14 Apr 2012

Menhom's arms - WIP

This time I can show you that Menhom has arms:) And that they're almost ready.
If I'm lucky, and Mr Bombel won't be too upset after visiting the Vet (=too big pain in the neck), I should be able to finish them and glue to the body.


cheers

'eM

10 Apr 2012

Menhom's base - almost finished (WIP)

The base is almost done, just a few more touches under the bones to add more shadows, and some dust on the dress when it will be glued in.


And of course the sides of the plinth and a nice plaque with the name.

cheers
'eM

4 Apr 2012

Quick update - Menhom's base WIP

Here is the first version of the base:  dry earth, bones and lots of dust.


 I'm not entirely sure if the cracked earth is the best choice here. Maybe I'll swap it for old and also cracked stone floor... But bones and dust stay in both cases. I just need to rearrange bones in nicer way, when I'll be sure what type of the surface will be used.

Dress is not yet ready, It lacks few more dots and lots of glazes to unify them a bit and bring back the redness of the midtones.

cheers

'eM